
1. Initial Installation
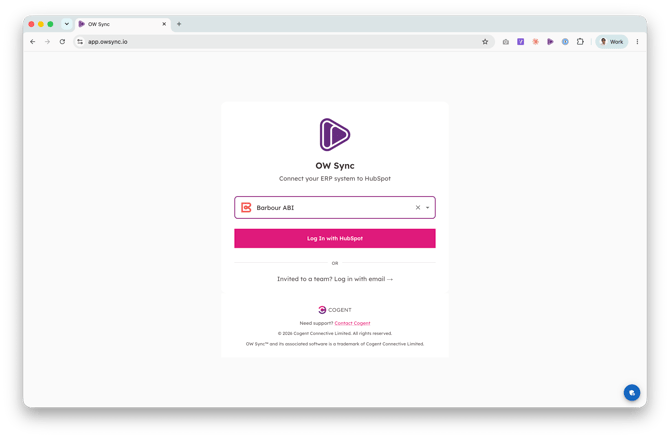
- Install OW Sync - Barbour ABI Connector from the official installation flow. On the OW Sync landing page, open the "Search for your ERP..." dropdown and select Barbour ABI, then click Log In with HubSpot. (If a teammate has already set up the account and invited you, use Invited to a team? Log in with email instead.)
- Select your HubSpot account from the list. We recommend testing on a sandbox or test account before deploying to production.
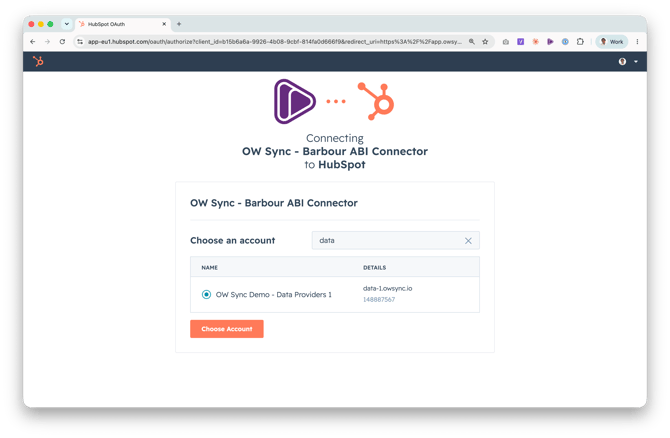
- Review the permissions required by the app — these include access to projects, listings, companies, contacts, and their property schemas — then click Connect app to proceed.
2. Account Setup
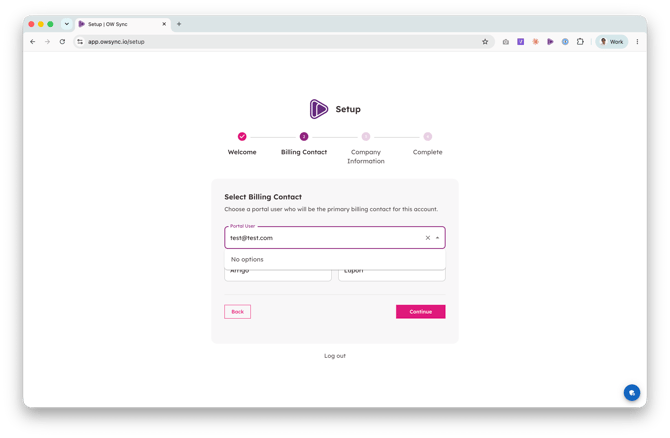
After connecting, you'll be guided through a four-step account setup wizard (Welcome → Billing Contact → Company Information → Complete). This runs once per OW Sync account.
- Welcome: A short introduction to the setup process. Click Continue.
- Select Billing Contact: Choose a portal user who will be the primary billing contact for this account from the Portal User dropdown — their first and last name are filled in automatically. Click Continue.
- Company Information: Enter your billing company details including domain, legal company name, street address, city, state/county, postal code, and country. This information will be used for invoicing. Click Continue to complete account setup and move on to connecting Barbour ABI.
3. Connect Barbour ABI
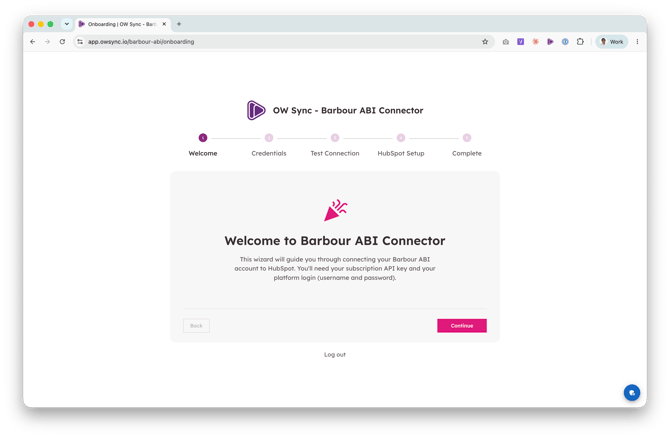
Next, the Barbour ABI onboarding wizard connects your Barbour ABI account. It has five steps: Welcome → Credentials → Test Connection → HubSpot Setup → Complete.
Barbour ABI authenticates with two things: your subscription API key (issued per company subscription — request it from your Barbour ABI Customer Success Manager if you don't have one) and your platform login (the username and password you use for the Barbour ABI web platform). OW Sync exchanges these for an access token on connect. All credentials are stored securely and encrypted.
- Welcome to Barbour ABI Connector: The onboarding wizard explains what you'll need — your subscription API key and your platform login (username and password). Click Continue.
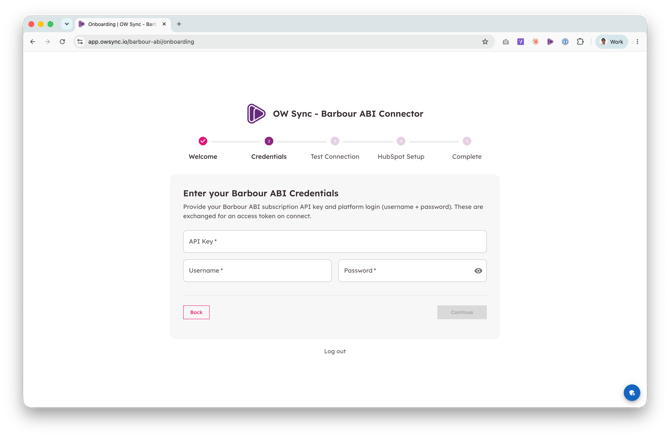
- Enter your Barbour ABI Credentials: Fill in the API Key, Username, and Password fields. Secret fields are masked as you type — use the eye icon to reveal them and double-check the values. Continue stays disabled until all fields are entered.
- Test Connection: OW Sync logs in to Barbour ABI with your credentials, obtains an access token, and creates your first connection. Once the check passes you'll see Connection Successful! confirming your Barbour ABI account is connected and ready to use. Click the button to continue.
4. HubSpot Setup — Choose Target Object & Create Properties
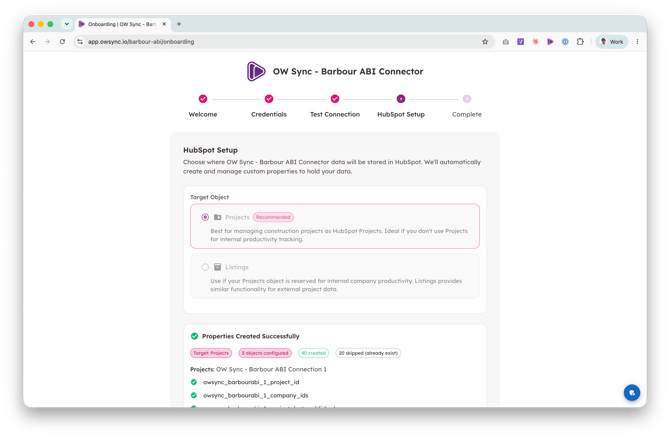
- Choose Target Object: Select where OW Sync should store Barbour ABI project data in HubSpot. You have two options:
- Projects (Recommended) — Best for managing construction projects as HubSpot Projects. Ideal if you don't use Projects for internal productivity tracking.
- Listings — Use if your Projects object is reserved for internal company productivity. Listings provides similar functionality for external project data.
- Click Create Properties to proceed. OW Sync automatically creates and manages the custom properties it needs to hold your Barbour ABI data on each synced object — projects (or listings), companies, and contacts.
- When it finishes you'll see a Properties Created Successfully summary showing how many objects were configured and how many properties were created or skipped (already existing properties are detected and left untouched, so re-running setup is safe). Click Continue.
5. Finish Onboarding
- You'll reach the You're All Set! screen confirming your Barbour ABI connector is configured and ready to use. Click Go to Dashboard to enter the app.
6. Choose What to Sync — Queries Tab
Barbour ABI is a one-way connector: data flows from Barbour ABI into HubSpot, and OW Sync never writes anything back to the Barbour ABI platform.
You choose which records sync using two selection tools, both managed from the Queries tab of the Mapping page — Saved Searches and Tags.
You can use either one or combine both.
Saved Searches
Saved searches are the filter configurations you create in the Barbour ABI web platform (location, planning stage, value, sector, and so on). OW Sync lists them live from your Barbour ABI account — no browser extension is needed.
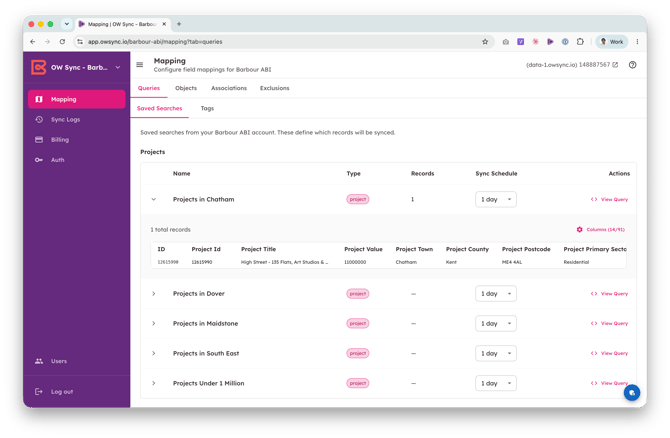
- Create or refine your saved searches in the Barbour ABI platform, then open the Saved Searches sub-tab. Each search appears with its name, object type (project, company, or people), record count, and sync schedule.
- Expand a search to preview the exact records and fields it returns, page through the results, and choose which columns to display. Click View Query to inspect the underlying filter.
- Set each search's Sync Schedule (daily by default; available frequencies depend on your plan) to control how often its records are refreshed.
Tags
Tags are labels you apply to individual projects and companies inside the Barbour ABI platform — Barbour's "Extract with Tags" pattern.
Tag exactly the records you want and OW Sync pulls precisely those.
- In the Barbour ABI platform, tag the projects and companies you want to sync. To make a tag visible to the integration (and your whole team), share it: go to My leads → Tags and share the tag with "Everyone".
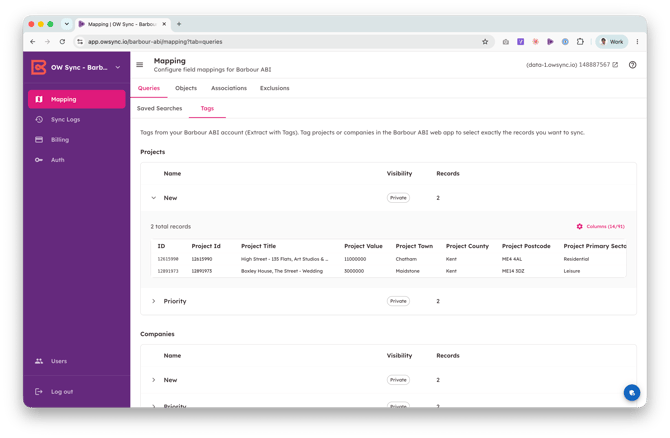
- Open the Tags sub-tab. Tags are listed in two sections — Projects and Companies — showing each tag's record count for that object type (a tag only appears in a section when it actually tags records of that type; people cannot be tagged).
- Expand a tag to preview the tagged records with the same field and column controls as saved searches.
7. Configure Sync Pairs — Objects Tab
Click the Objects tab to configure how Barbour ABI records land in HubSpot. Three sync pairs are pre-configured:
- Projects → HubSpot Projects (or Listings, depending on your setup)
- Companies → HubSpot Companies
- People → HubSpot Contacts
For each pair:
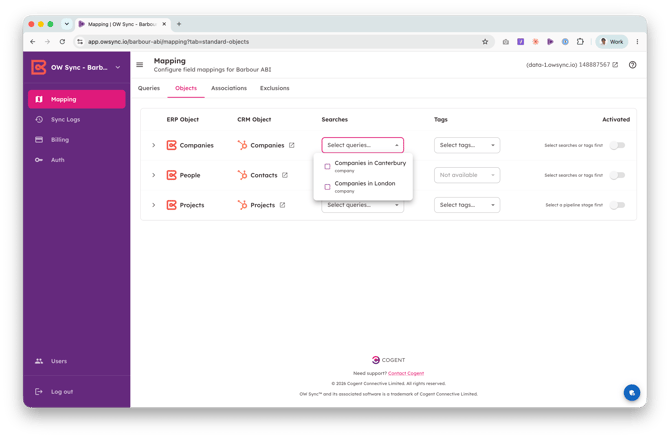
- Attach Searches and Tags: Use the Searches dropdown to select which saved searches feed the pair, and the Tags dropdown to add tagged records.
- Both selectors only offer entries matching the pair's object type; the People pair has no tags dropdown option since Barbour ABI tags never apply to people. A pair needs at least one search or tag selected before it can be enabled.
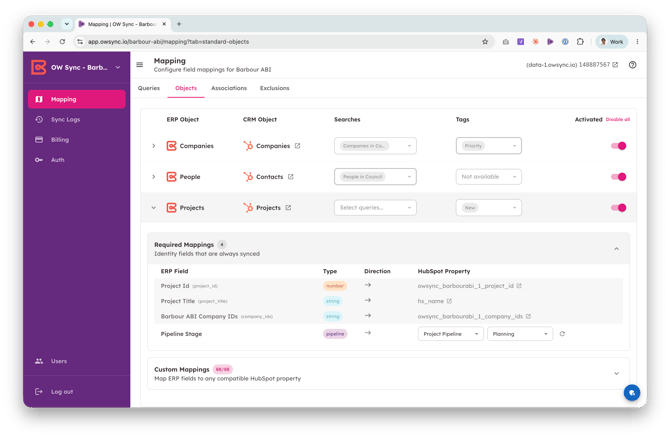
- Configure Pipeline Stage (Projects target only): expand the Projects pair and select the pipeline and stage new project records should enter. Click Refresh Pipelines if your pipelines don't appear.
- If you chose Listings as the target, no pipeline stage is needed.
- Review Field Mappings: expand a pair to see three sections:
- Required Mappings — identity fields OW Sync manages for you (locked, always synced)
- Standard Mappings — Barbour ABI fields that map to native HubSpot properties, with a per-field Sync checkbox
- Custom Mappings — the remaining Barbour ABI fields, pre-mapped to the auto-created HubSpot properties; you can change the target property or disable individual fields
- Enable Sync: once searches/tags are selected and mappings reviewed, enable the pair with its Activated toggle. Repeat for Companies and Contacts as needed.
- The Associations tab shows how synced records link together in HubSpot — the companies and people working on each project are associated to it automatically, based on their roles in Barbour ABI.
- The Exclusions tab lets you filter records out of the sync.
8. Manage Connections & Test Sync
- Navigate to Auth in the left sidebar. The Credentials tab shows your HubSpot connection status and your Barbour ABI connections. Expand a connection card to test or update its credentials.
- Barbour ABI access tokens expire after 30 days of inactivity and during major Barbour ABI platform releases. OW Sync re-authenticates automatically using your stored credentials; if your Barbour ABI password changes, update it here.
- Use Add Connection to link additional Barbour ABI accounts to the same HubSpot portal — each connection gets its own sync pairs, mappings, and HubSpot properties.
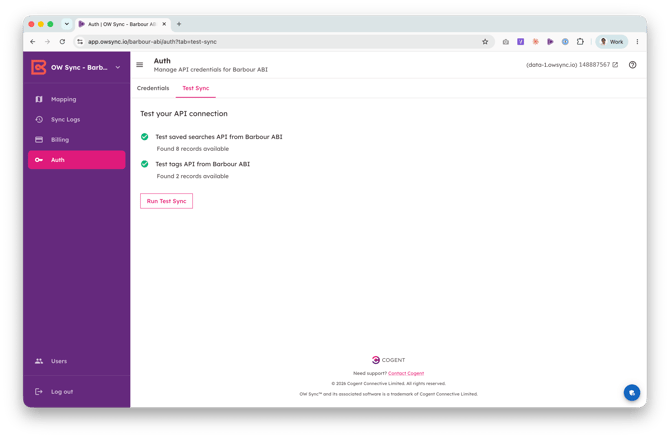
- The Test Sync tab runs live checks against your Barbour ABI account — it counts your saved searches and tags to confirm the connector can reach your data.
9. Review Sync History & Verify in HubSpot
- Navigate to Sync Logs in the left sidebar to view synchronization history. The first sync begins shortly after enabling a pair; subsequent syncs run automatically on each pair's schedule.
- Once the sync completes, open your HubSpot Projects (or Listings), Companies, and Contacts to verify the data.
- You should see Barbour ABI records with all mapped fields populated, and each project associated to the companies and contacts working on it.
This guide will be updated with new functionality, object types, and synchronization options as they become available. Visit the OW Sync website for the latest features, or contact the Cogent Connective team with any questions not covered here.