
1. Before You Start — Prepare Acumatica
Unlike connectors that authenticate with a simple API key, Acumatica requires a one-time setup inside your Acumatica instance: a Connected Application that OW Sync connects through. You'll need an Acumatica user with administrator access (or equivalent rights to the Connected Applications screen) to complete this section.
- Open the Connected Applications screen: In Acumatica, search for Connected Applications (screen ID SM303010) — it lives under the Integration area of the menu.
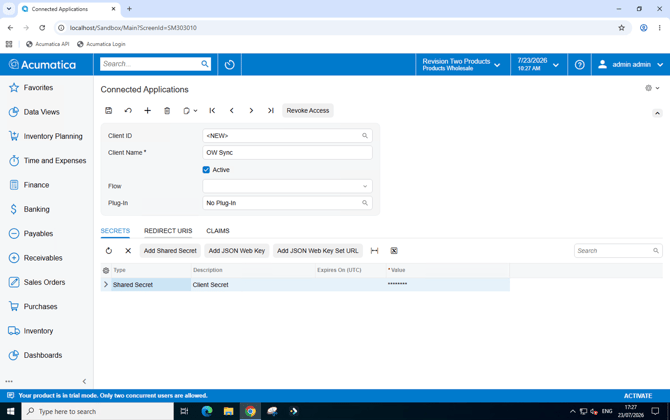
- Create the connected application: Add a new record and configure it as follows:
- Client Name: e.g.
OW Sync - OAuth 2.0 Flow: Authorize Code
- Under Redirect URIs, add the URL the Cogent team provided
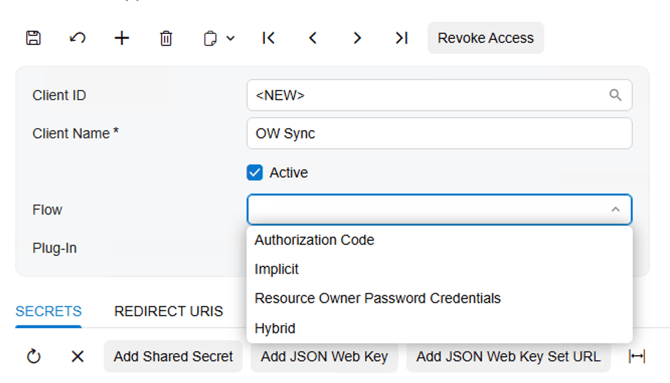
- Client Name: e.g.
- Add a shared secret: On the Secrets tab, click Add Shared Secret, give it a description (e.g.
OW Sync), and copy the Value — Acumatica shows it once only, so save it somewhere safe now. If you lose it, delete the secret and add a new one. - Copy the Client ID: Save the connected application — Acumatica generates the Client ID in the form
B0872DCA-...@YourTenant. Copy the full value including the@Tenantsuffix; OW Sync needs all of it. - Check the refresh token settings: If your Acumatica version shows refresh token options on the connected application, leave the expiration mode on Absolute with the default 30-day lifetime. Acumatica connections require a quick re-authorisation when the refresh token expires — see "Keeping the connection alive" at the end of this guide.
- Check the authorising user: The Acumatica user who approves the connection in step 4 below must have access rights to the records OW Sync works with (customers, vendors, contacts, opportunities, sales orders, invoices, and stock/non-stock items) through the web services API. Many teams create a dedicated integration user for this.
- Note your instance URL: This is the address you use to open Acumatica in the browser — e.g.
https://yourcompany.acumatica.comfor SaaS instances. Self-hosted sites may run under a path segment (e.g.https://server:8080/AcumaticaERP); note the address, port, and path exactly.ℹ️ Self-hosted instances: Your browser must be able to reach the instance to complete the authorisation, and OW Sync's servers must be able to reach it to sync. If your firewall requires IP whitelisting, allow 209.71.85.146.
2. Initial Installation
- Install OW Sync - Acumatica Connector from the official installation flow. On the OW Sync landing page, open the "Search for your ERP..." dropdown and select Acumatica ("Two-way sync between Acumatica & HubSpot"), then click Log In with HubSpot.
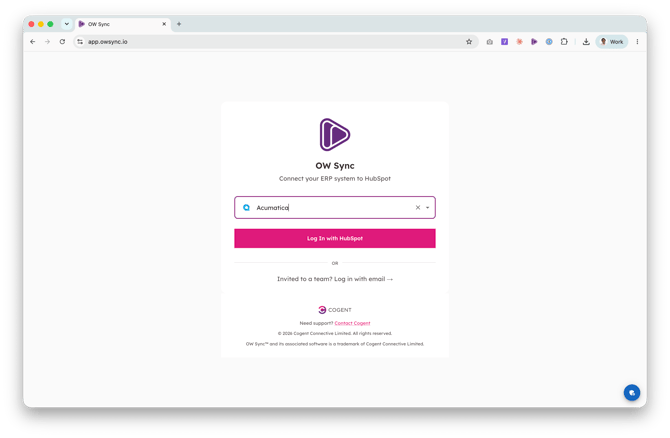
- Select your HubSpot account from the list. We recommend testing on a sandbox or test account before deploying to production.
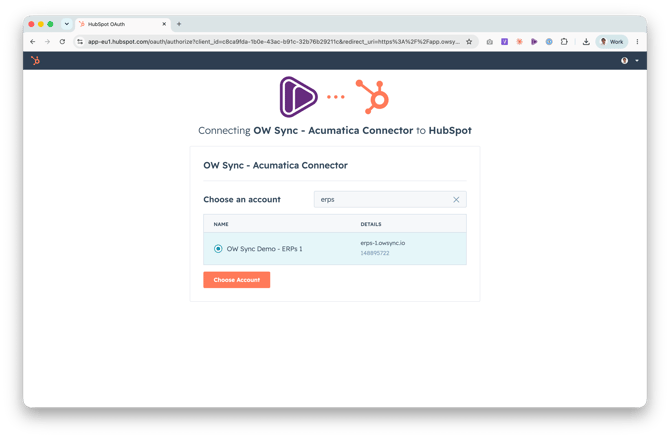
- Review the permissions required by the app — these include access to your companies, contacts, deals, orders, invoices, products, line items, and their property schemas — then click Connect app to proceed.
3. Account Setup
After connecting, you'll be guided through a setup wizard.
- Select Billing Contact: Choose a portal user who will be the primary billing contact for this account from the dropdown, then click Continue.
- Company Information: Enter your billing company details including domain, legal company name, street address, city, state/county, postal code, and country. This information will be used for invoicing. Click Continue to proceed.
4. Connect Acumatica
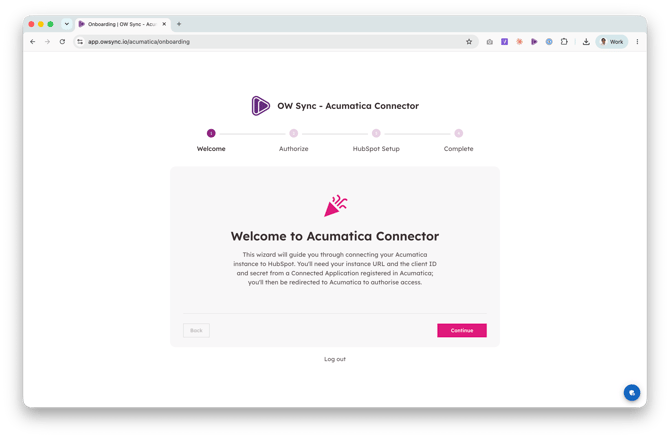
- Welcome to Acumatica Connector: The onboarding wizard explains what you'll need — your instance URL and the client ID and secret from your Connected Application (prepared in section 1) — and that you'll be redirected to Acumatica to authorise access. Click Continue.
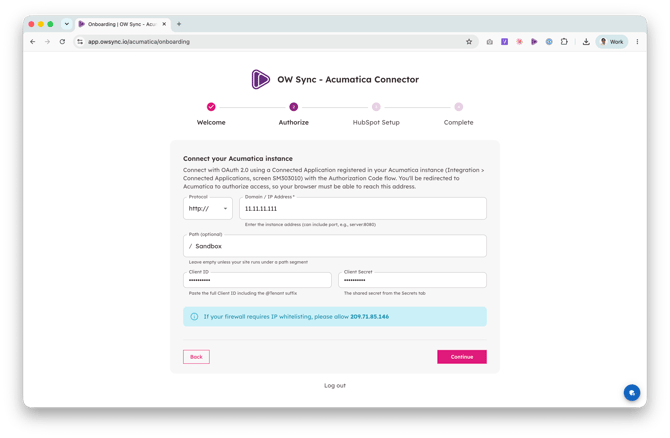
- Connect your Acumatica instance: Enter:
- Protocol and Domain / IP Address — the instance address, e.g.
yourcompany.acumatica.com(can include a port, e.g.server:8080) - Path (optional) — leave empty unless your site runs under a path segment (e.g.
AcumaticaERP) - Client ID — the full value including the
@Tenantsuffix (section 1, step 4) - Client Secret — the shared secret from the Secrets tab (section 1, step 3)
- Protocol and Domain / IP Address — the instance address, e.g.
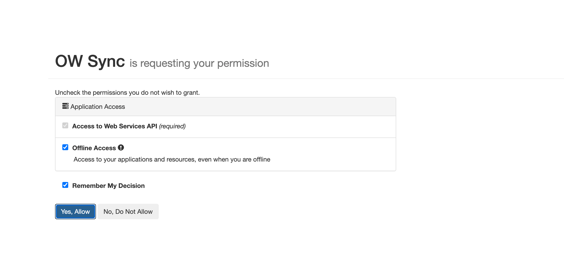
- Authorise in Acumatica: You'll land on Acumatica's sign-in and consent screen. Sign in (if prompted) with the user prepared in section 1, step 6, review the access request for the OW Sync application, and click Yes, Allow. Once authorised, you'll be returned to onboarding automatically.
5. HubSpot Setup — Create Properties
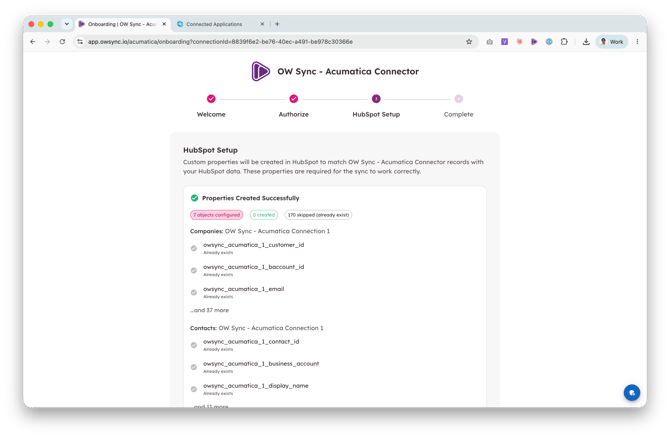
Acumatica data is mapped to the matching native HubSpot objects (companies, contacts, deals, orders, invoices, products, and line items). OW Sync will automatically create and manage the custom properties needed to hold your data — there's no target object to choose.
- Click Create Properties to proceed. OW Sync will create and manage the custom properties for your customers, vendors, contacts, opportunities, sales orders, invoices, items, and their line items.
6. Finish Onboarding
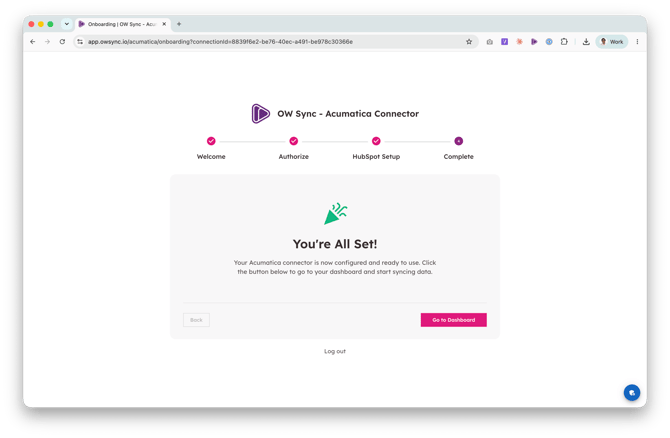
- Once properties are created, you'll see the All set! screen confirming your Acumatica connector is configured and ready to use. Click Go to Dashboard to enter the app.
7. Review Your Sync Configuration
- After onboarding, you'll land in the OW Sync app. The Mapping page shows your pre-configured sync pairs, which bring Acumatica data into the matching native HubSpot objects:
- Acumatica Customers → HubSpot Companies
- Acumatica Vendors → HubSpot Companies
- Acumatica Contacts → HubSpot Contacts
- Acumatica Opportunities → HubSpot Deals
- Acumatica Sales Orders → HubSpot Orders
- Acumatica Sales Invoices → HubSpot Invoices
- Acumatica Stock Items / Non-Stock Items → HubSpot Products
- Acumatica Sales Order Lines / Opportunity Products / Sales Invoice Lines → HubSpot Line Items
- Use the Activated toggle on each row to turn a sync pair on or off, and the Interval dropdown to set how often it runs (sync frequency depends on your plan). You can review the field mappings for any pair by expanding its row before enabling it.
ℹ️ Opportunities need a pipeline stage: Before activating the Opportunities pair, expand its row and choose the HubSpot deal pipeline and stage that synced opportunities should land in.
ℹ️ Large first syncs: On accounts with a long transaction history, the first run of the items, sales orders, invoices, and line-item pairs can take several hours while the backlog is imported. Subsequent runs only pick up changes and complete quickly. We recommend activating Customers first, then enabling the remaining pairs once it completes.
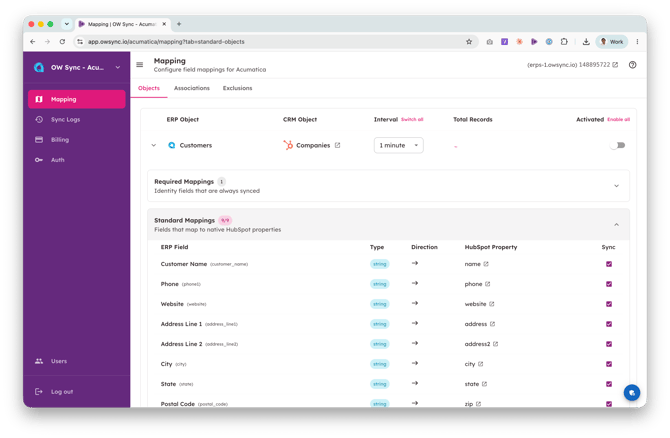
- Map Acumatica fields to HubSpot properties as needed. Fields are pre-mapped to the auto-created HubSpot properties by default, and you can change the target property or disable individual field syncs from the expanded row.
8. Create Records in Acumatica from HubSpot (Optional)
OW Sync ships HubSpot workflow actions that write back to Acumatica, so you can create and update records directly from HubSpot without re-keying data. Add any of these actions to a workflow (for example, when a deal reaches a closed-won stage):
- Create Customer, Update Customer
- Create Contact, Update Contact
Each action includes an optional Additional Fields (JSON) input for account-specific fields (including fields your Acumatica customer or contact classes require). Action outcomes — including any Acumatica validation errors, such as a class requiring an email address — appear in the workflow's action logs.
9. Review Sync History
- Navigate to Sync Logs in the left sidebar to view synchronization history.
- The first sync will begin shortly after you enable a sync pair. Subsequent syncs run automatically on the schedule you set.
10. Verify in HubSpot
- Once a sync completes, navigate to the matching HubSpot objects — Companies, Contacts, Deals, Orders, Invoices, and Products — to verify the data.
- You should see Acumatica records with all mapped fields populated, opportunities, sales orders, and invoices linked to their customer's company and contacts, and their line items attached to the parent deal, order, or invoice.
ℹ️ Keeping the connection alive: Acumatica refresh tokens expire 30 days after authorisation, so the connection requires a quick re-authorisation roughly once a month. If syncs report an expired connection, open the Connections page in OW Sync and click Reconnect on your Acumatica connection — you'll go through the same one-click Acumatica consent as in section 4, with no other reconfiguration needed.
This guide will be updated with new functionality, object types, and synchronization options as they become available. Visit the OW Sync website for the latest features, or contact the Cogent Connective team with any questions not covered here.